
How to Install a Premier Range Fountain: Step-by-Step Assembly Guide
6 August 2026 · Geoffs Garden Ornaments · Installation Guides
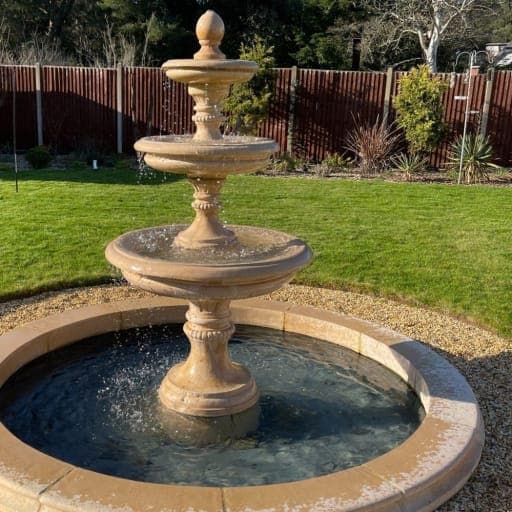
Whether you have a one tier, two tier or three tier fountain, the assembly is the same. The number of bowls changes; the method doesn't. And whichever pool surround you've chosen, the centre fountain goes together in exactly the same sequence.
The principle is simple. A pump sits submerged inside a pump housing at the centre of the pool. It draws water in and sends it up through pipework hidden inside the pedestals to the top of the feature, where it cascades back down through each bowl and returns to the pool below.
Here's the full build, step by step.
Step 1: Set the pump housing
The pump housing is the first thing to go in, placed at the centre of the pool. The pump itself sits inside it.
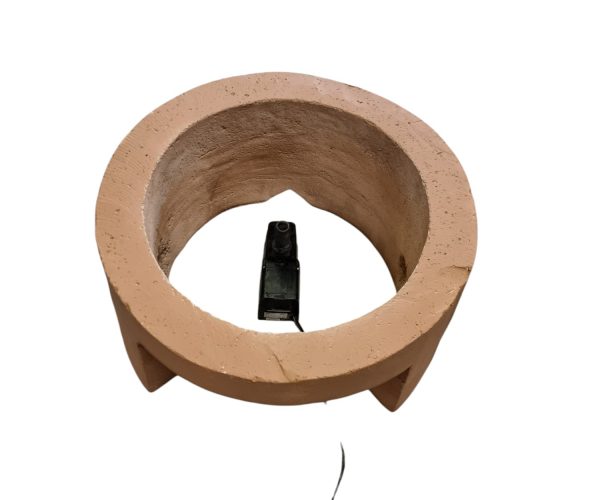
This isn't just a cover. The housing is designed to give you easy access to the pump for maintenance later, without dismantling the fountain above it. That matters more than it sounds — a pump is the one component you can expect to service or eventually replace.
Step 2: Connect the corrugated pipework
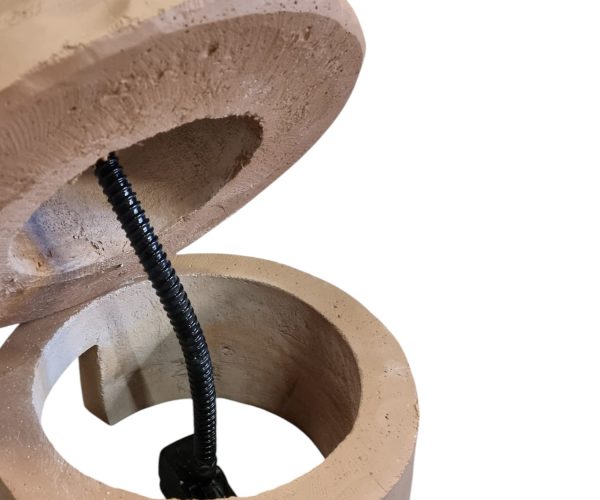
Black corrugated pipe connects to the top of the pump. This is what will carry the water upward, and it feeds through the base pedestal to the largest bowl.
Step 3: Position the large pedestal
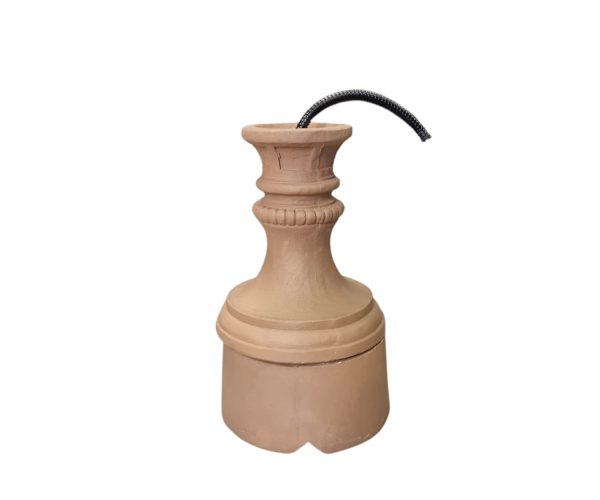
The largest pedestal sits on the pump housing, with the water hose feeding up through it.
Take your time getting this one square and central. Everything above it inherits its position.
Step 4: Fit the large bowl
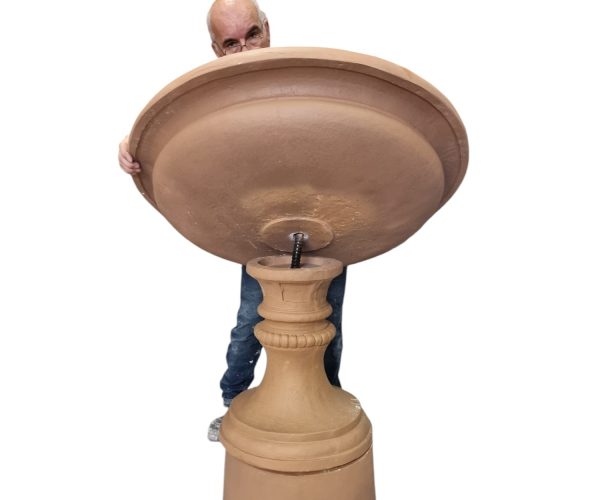
The pipe from the pump feeds up through the pedestal and into the largest bowl.
Step 5: Connect the 3 way tap
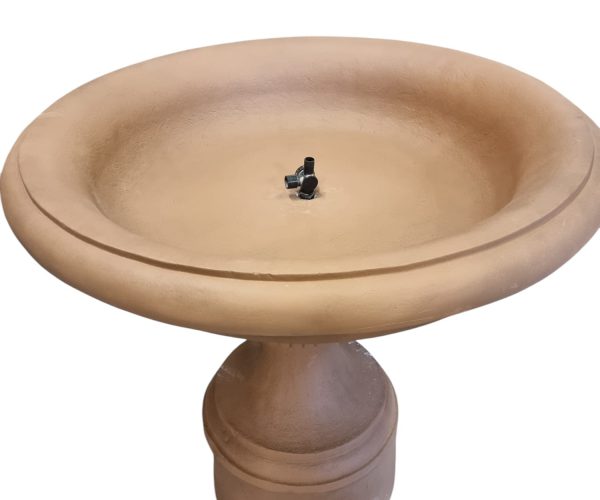
A 3 way tap connects onto the corrugated hose. This is the clever part of the system, and worth understanding.
The tap splits the flow: a percentage of the water is released into the large bowl, and a percentage continues up to the top of the fountain. That's what lets you balance the feature. Too much going to the top and the lower bowls look starved; too much into the large bowl and the top tier barely trickles.
You'll adjust this once the fountain is running, so don't agonise over the setting now.
Step 6: Fit the tap housing and medium pedestal
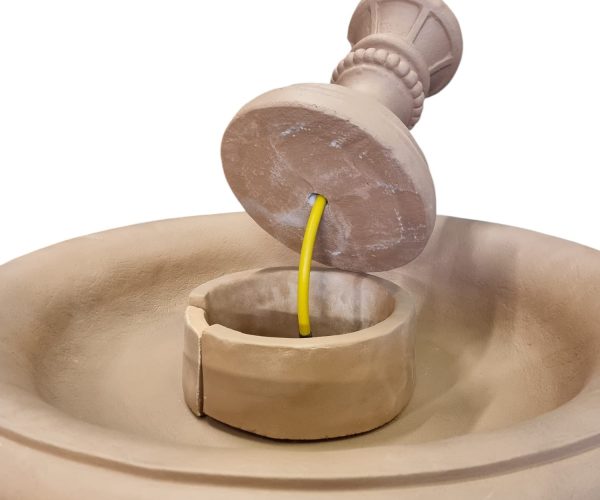
The tap housing sits in the centre of the bowl, over the 3 way tap. A length of hose connects to the top of the 3 way tap and continues up to the top of the fountain.
The medium pedestal then sits on top of the tap housing. Feed the pipework through as you go, rather than trying to thread it afterwards.
Step 7: Add the medium bowl and small pedestal
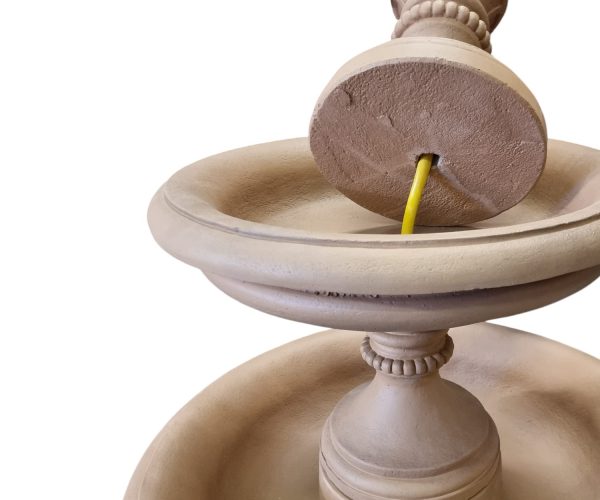
The medium bowl sits on top of the first pedestal, and the next pedestal sits inside the medium bowl.
Step 8: Small bowl and final
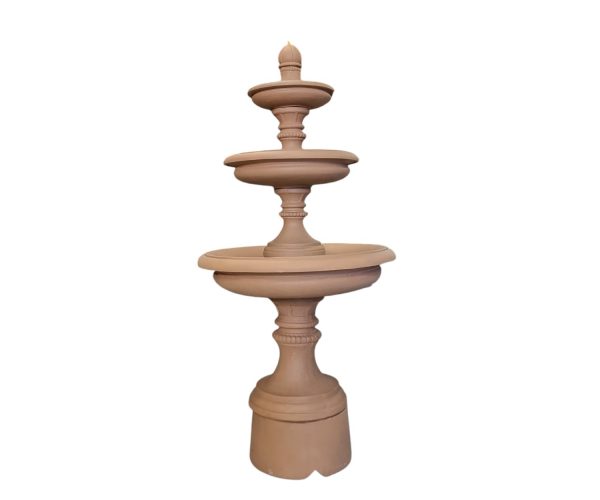
Add the small bowl. The finial piece goes on top, over the last length of hose, finishing the fountain and concealing the pipework.
That's the assembly complete.
The fibreglass base pool
Premier range fountains are supplied with a fibreglass base pool that's exclusive to us, incorporating an edging flange on which the base pool blocks are assembled. We spent six months designing and testing it.
Fibreglass was chosen for good reason. It's the same material used for ponds holding thousands of gallons, for the hulls of boats, and for flat roofing on houses. It doesn't rot, split or perish, and the outer edge is rigid enough to carry the stone blocks that sit on it.
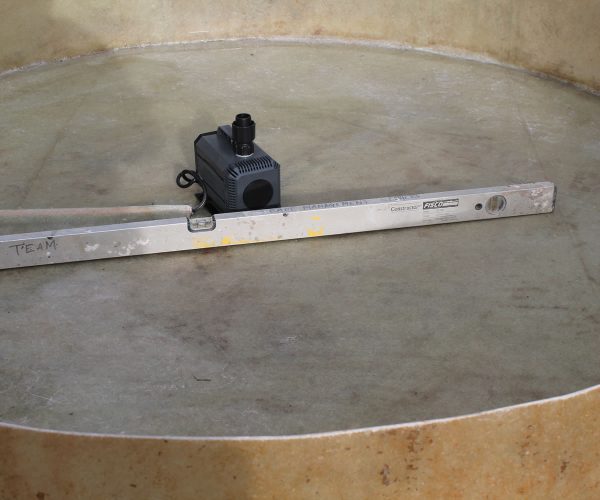
Lay the fibreglass pool onto a level, flat, solid surface. You'll need a spirit level to make sure the base is sitting true.
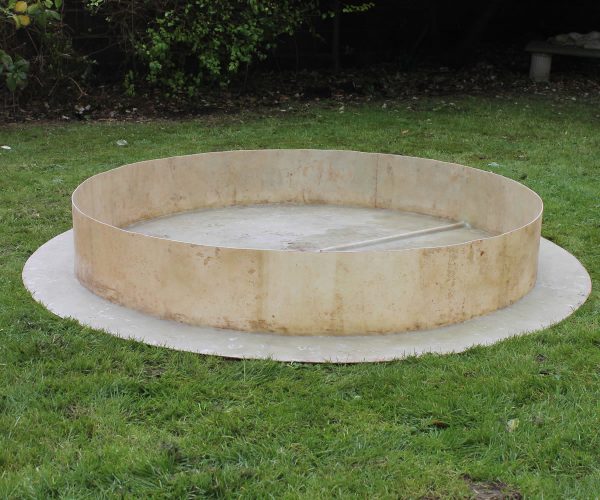
The pump sits at the centre of the pool and its cable is sealed into the provisions made for the power supply. The pump comes with 10 metres of cable, which exits at the side of the pool at the bottom, so the electrical connection is straightforward and the pump can be replaced easily if it ever needs to be. Once installed, the pump is completely hidden inside the base of the fountain.
Stack and level
Stack the fountain at the centre of the pool.
Every fountain is pre-levelled at our factory, but some levelling may still be needed on site. Ground settles, surfaces are rarely perfect, and it's worth checking as you build rather than at the end.
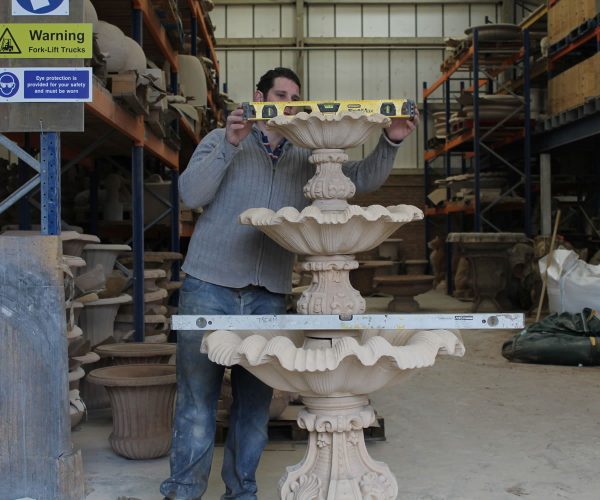
While the base pool is filling with water, assemble the edging blocks. It's a useful bit of overlap — the filling takes a while, and the blocks are the last visual element to go in.
Balancing the flow
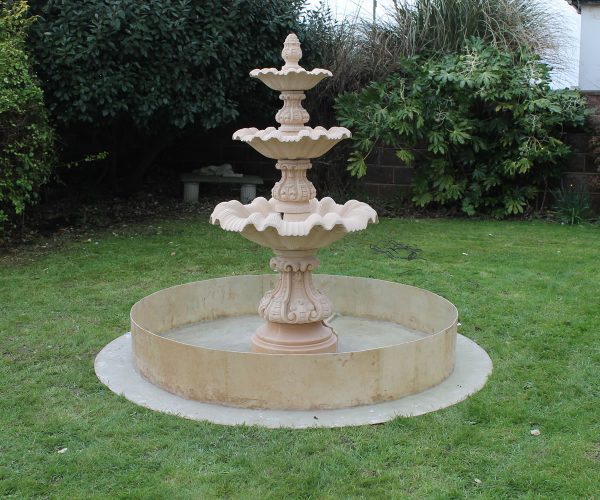
Once the pool is full and the pump is running, watch the fountain for a few minutes before you tidy up.
Adjust the 3 way tap until each tier looks right. What you're after is a continuous, even sheet of water off each bowl rather than a strong jet at the top and a dribble below. Bear in mind that a flow that looks impressive on a still day will drift in the wind, so err slightly on the gentle side if your garden is exposed.
Check the water is falling evenly all the way round each bowl too. If it favours one side, the fountain isn't quite level and it's far easier to correct now than later.
A note on the electrics
The pump's 10 metre cable is designed to make the electrical connection simple, but the supply it connects to is a job for a qualified electrician if you don't already have a suitable outdoor socket. Outdoor mains electrics in the UK must be properly rated, RCD protected and installed to current regulations. Near standing water, this isn't a corner to cut.
Water changes and maintenance
For water changes, we recommend a sump pump, which makes emptying the base pool quick and straightforward. These are available on our accessories page.
Because the pump housing keeps the pump accessible, routine maintenance doesn't mean taking the fountain apart.
Delivery
Premier range fountains are delivered on a weekday of your choice by one of our own drivers, not a third party courier. It means the whole process from payment to delivery stays with us, and whoever arrives with your fountain knows what they're carrying.
Any questions before you start?
Call us on 01243 532 390 or 01243 532 357. Our phone lines are open 8am to 8pm, seven days a week, and we're always happy to talk an installation through beforehand.
You can also see premier range fountains running at our Chichester showroom, open Monday to Friday 8am to 4pm and Saturday mornings. Everything is made here in the UK.
Related posts

31 July 2026
How to Install a Contemporary Designer Fountain: No Foundations, No Builders
Most people assume a stone water feature means groundwork, a builder and a concrete base. Our contemporary designer fountains need none of it — two people, level ground and an afternoon. Here's exactly what's involved, step by step.
14 September 2026
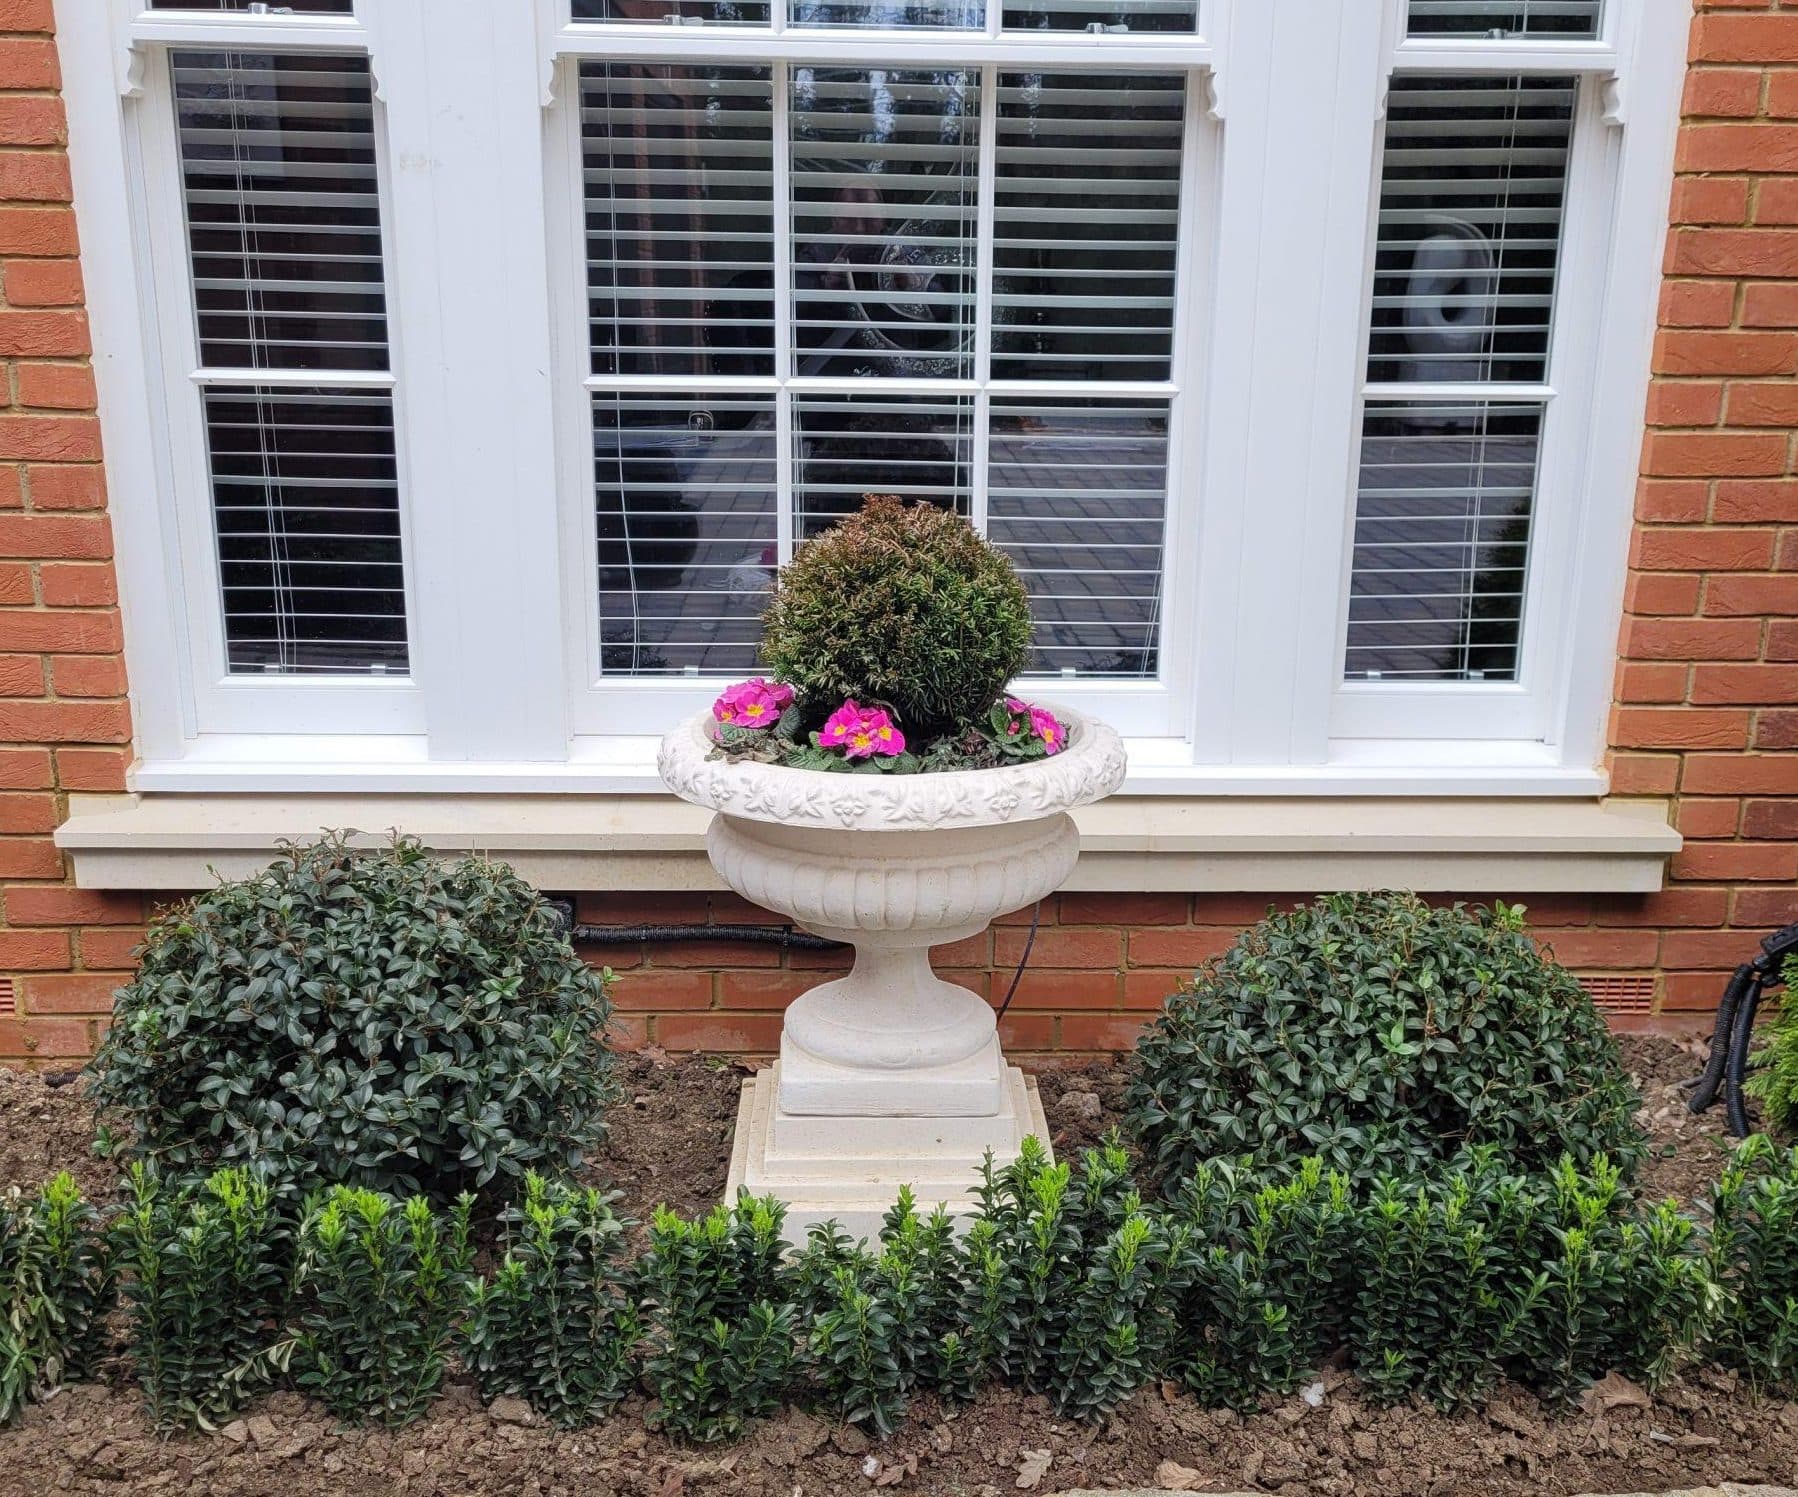
Garden Urns on Plinths: Pairs, Proportions and Planting
Stone urns are one of the oldest devices in garden design. When to choose a pair or a single urn, how to match an urn to a plinth, where they look best, and what to plant in them through the year.
14 September 2026
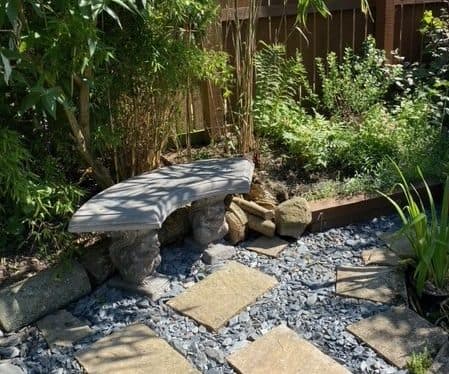
Stone Garden Benches: Curved or Straight, Small or Large?
A stone bench is part seat, part ornament, and it stays put all year. Where curved and straight benches work best, how to fit a small bench into a narrow space, the base it needs, and how to make it comfortable.